Friday, April 26, 2013

Blogger Giveaway Op

HIYW Giveaway

Warming It Up Your Way Giveaway Sign Ups

Jenn's Blah Blah Blog and Pink Ninja Media bring you the Warming It Up Your Way Giveaway! Sign ups are now open, and we're asking all you awesome bloggers who love to promote giveaways to join us for this fabulous giveaway!
 
Hi everyone I'm opening for another month of the Have It Your Way Giveaway! Every month there is a new giveaway where the winner chooses their prize. One lucky person can choose a prize valued up to $500, and bloggers will get one free link in this giveaway. Choose between Twitter and Pinterest. If you want to sign up for this fabulous giveaway you can visit

Tuesday, April 23, 2013

Despicable Me Minion Goggles


Mini man C is obsessed with the movie Despicable Me. He calls it Pickle and asks to watch it at least once or twice everyday. We try not to let him watch it all the time, but since I'm a sucker for sad faces, and he really enjoys it, I usually cave.

He loves the little minion characters so when I bought these cute little tins from PickYourPlum I knew I was going to have to make minion goggles for the mini man.

These are pretty basic and simple to make. Think I had them done in about 15 minutes.


I began by using a black headband for the strap. Only tricky part here is that to get the goggles to sit in the right place you either need to assemble on the wearers head (not an option with a 2 year old) or get something the same size to stretch the band around. I used two cork pot rests to get about the right size.

I used snaps (from KAMSnaps) to attach the tins to the headband. I would have liked to actually have the tins removable by snap but had to go all the way through due to the shape of my snap pliers making it so I could only set them that one way.

Punch holes, set snaps, and the goggle frames are done. You could also hot glue the tins on but I wanted them to be sturdy enough for a 2 year old to play with them.

Finally I cut circles out of yellow felt and set the other side of the snap (again these could just be glued in but I liked the idea of the snap for play purposes). Then I hot glued the googley eyes onto the felt, snapped the pieces inside the tins and put on the tin lids to act as the goggle lens.


I think they turned out cute and C loves them, so that's good enough for me!

Monday, April 22, 2013

Earth Day

Being as it's Earth Day today I wanted to share my all time favorite photograph I have ever taken. It was a chance shot taken with a pretty basic camera so to say I was proud when I got this shot would be an understatement. It was one of those moments when I was almost jumping up and down it was just that cool. It reminds me of both the beauty and amazing power of nature.

Tuesday, April 16, 2013

Quick Tip Tuesday

Quick Tip


Bought yogurt and can't eat it all before it goes bad? Love smoothies but hate getting everything out to make them? Here's a quick tip for both problems. Freeze your yogurt in cubes! I use a Green Sprouts Silicone Freezer Tray to freeze 1 oz size cubes and toss them in the blender with fruit and milk for quick smoothies! You can freeze any kind of yogurt, even Greek yogurt.

Thursday, April 11, 2013

Under Construction

When we bought our house almost 11 years ago I knew we were in for a lot of work. It was an old house that had never been updated in any way. Since living here we have completed a huge list of updates, fixes, and accidental repairs. Currently we are working on the largest of all the projects: finishing the entire basement. I'm a hobby architect / designer. I have no schooling or training but I love it. So I thought I'd show you what I've been working on and what the guys have been building our basement based upon.

Saturday, April 6, 2013

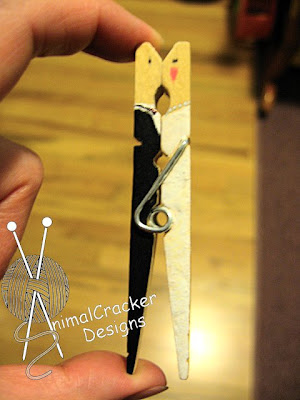
Kissing Clothespin


Found this one on Pinterest about a year ago and made it to hold the card on a wedding present for my nephew and his wife. This is an incredibly simple and cheap craft that is also super cute. You can use paints, ink, markers, or even some white out on your clothespin. All you do is color one side white and the other black just below the 'o' notch in the clothespins that forms the neck. Add a little white to the groom side for his shirt and finish off with a bow tie. I used a silver sharpie to give the bride a necklace, black sharpie for all the black area and liquid white out for the white area. Don't forget a pink heart for the bride's cheek and dot those eyes and that's it. If you wanted to get fancy you could add glitter or draw in piping or lace. Could even try to match the happy couple!